Radio Mast Streaming Quickstart Guide
The Radio Mast Streaming Network provides live audio stream delivery for radio broadcasting. All you need is your computer, an encoder and the Radio Mast Streaming Network to get started sharing your content with the world!
Step 1: Download our encoder.
We suggest that you use Rocket Broadcaster, but you can use any Icecast compatible encoder that suits your needs. The advantage of using Rocket Broadcaster is that it provides the best, easiest integration with Radio Mast, and can be controlled remotely. This is especially useful if you aren’t always by your computer when you are broadcasting.
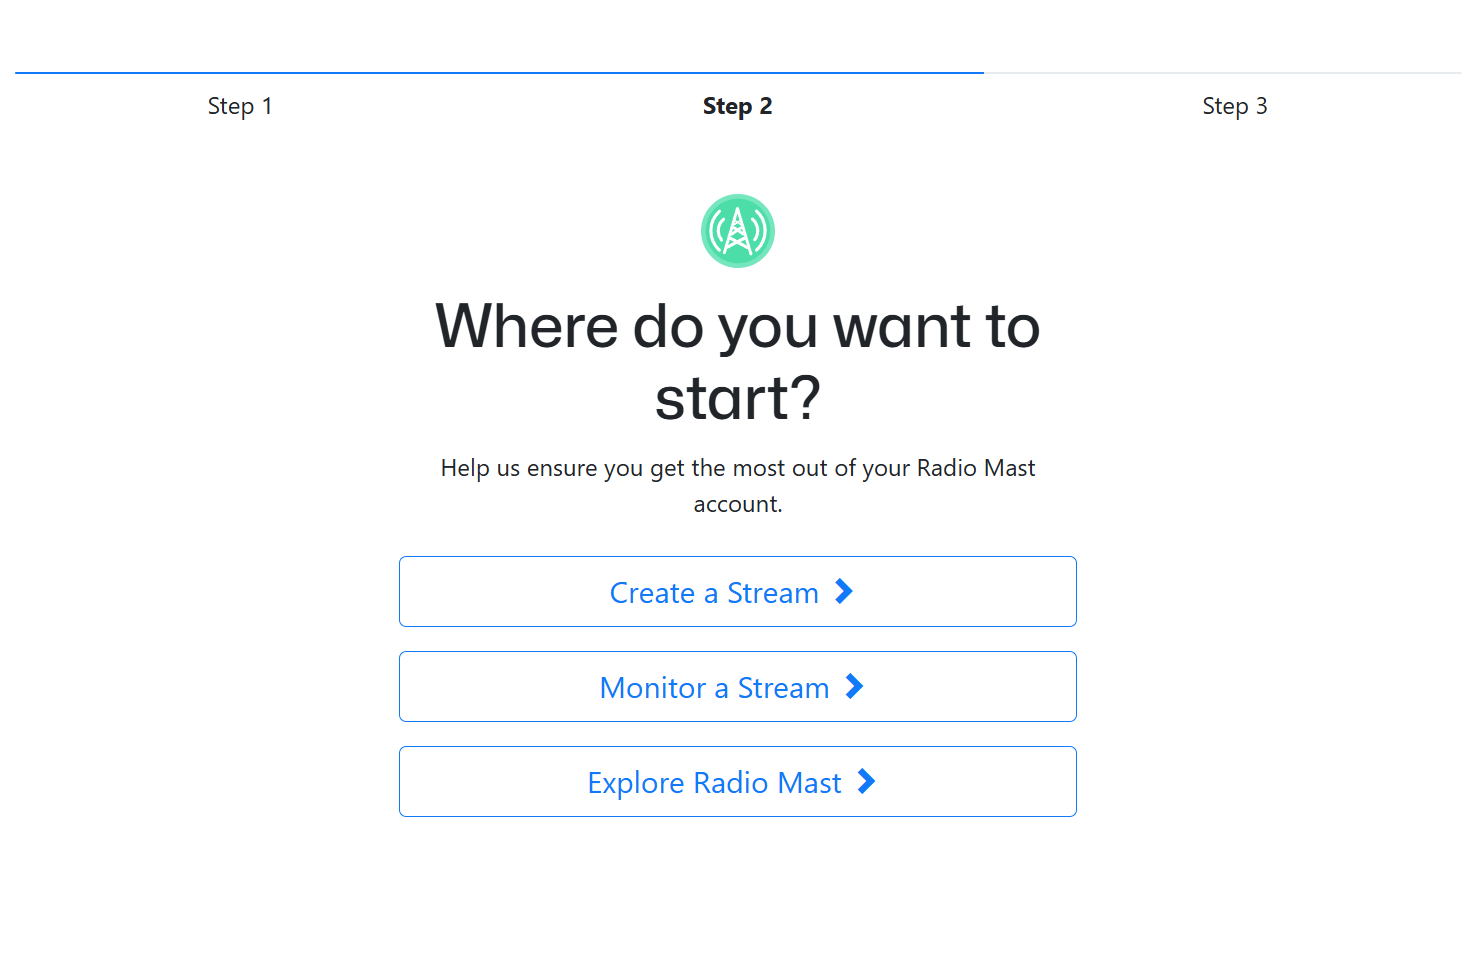
Step 2: Sign up for a Radio Mast trial account.
Visit Radio Mast and sign up for a free trial. After you fill out your information and verify your email, you'll reach Step 2 of the signup process.
Click Create a Stream to get started.
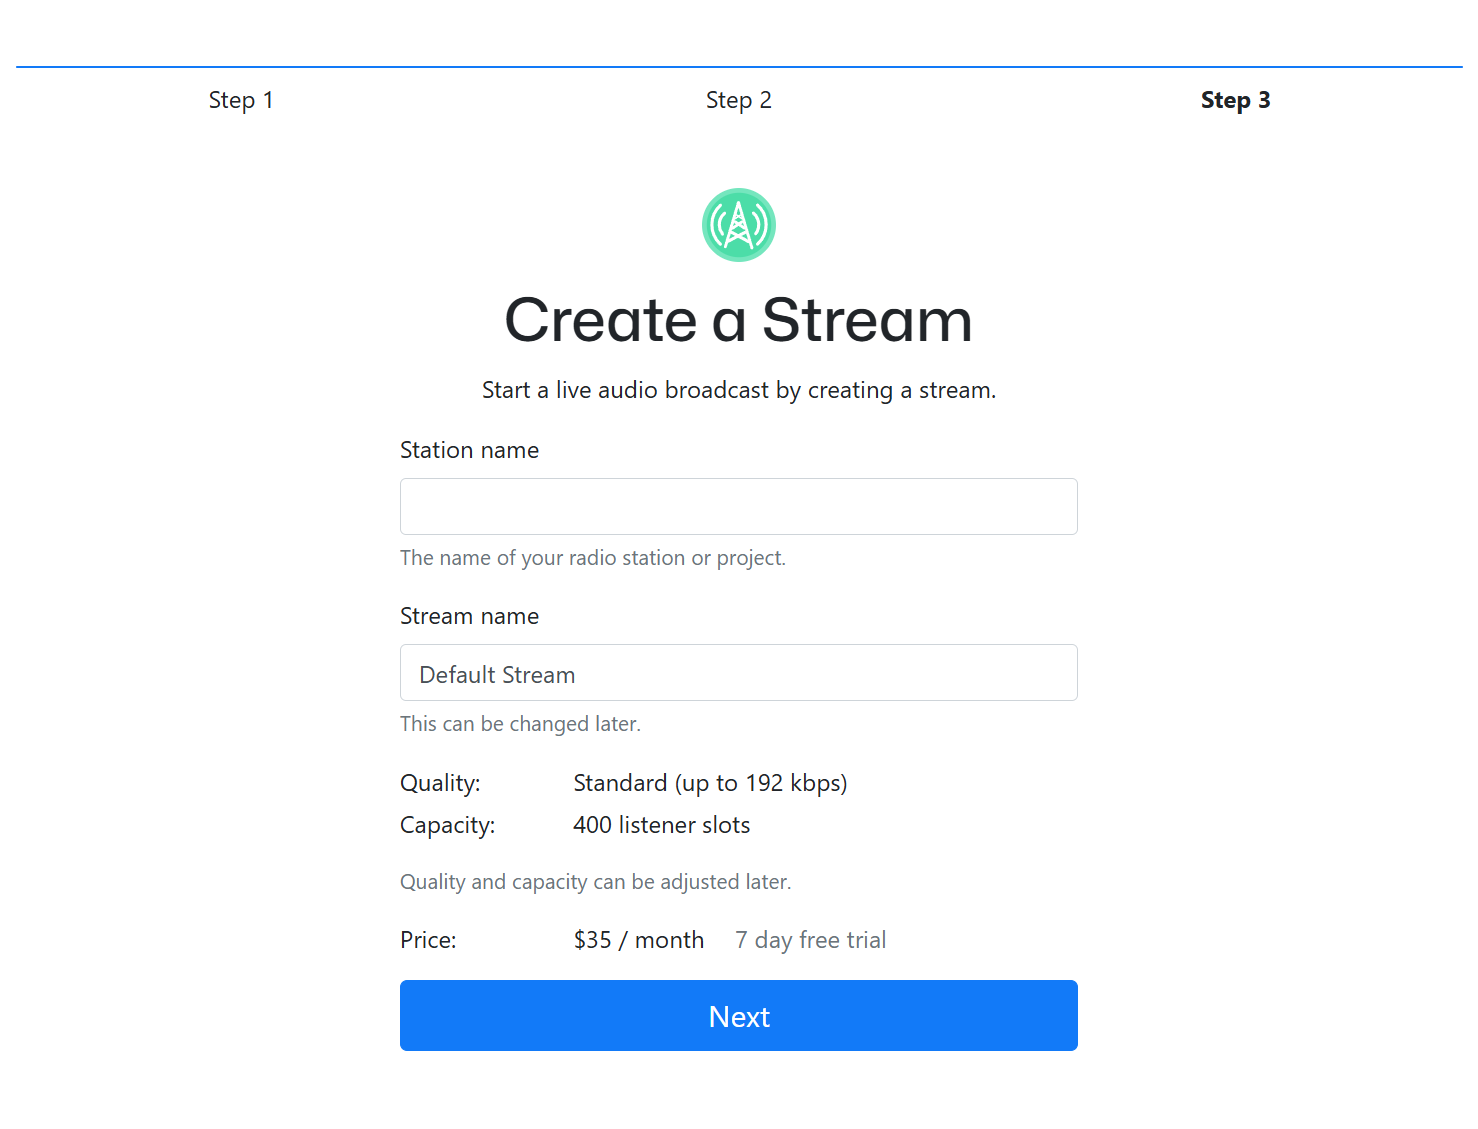
Next, you will need to name your new radio station. This will be visible to listeners, so choose your name carefully!
You can leave the Stream Name at the default. These can both be changed later.
Click Next to proceed.
Step 3: Connect to Start Broadcasting
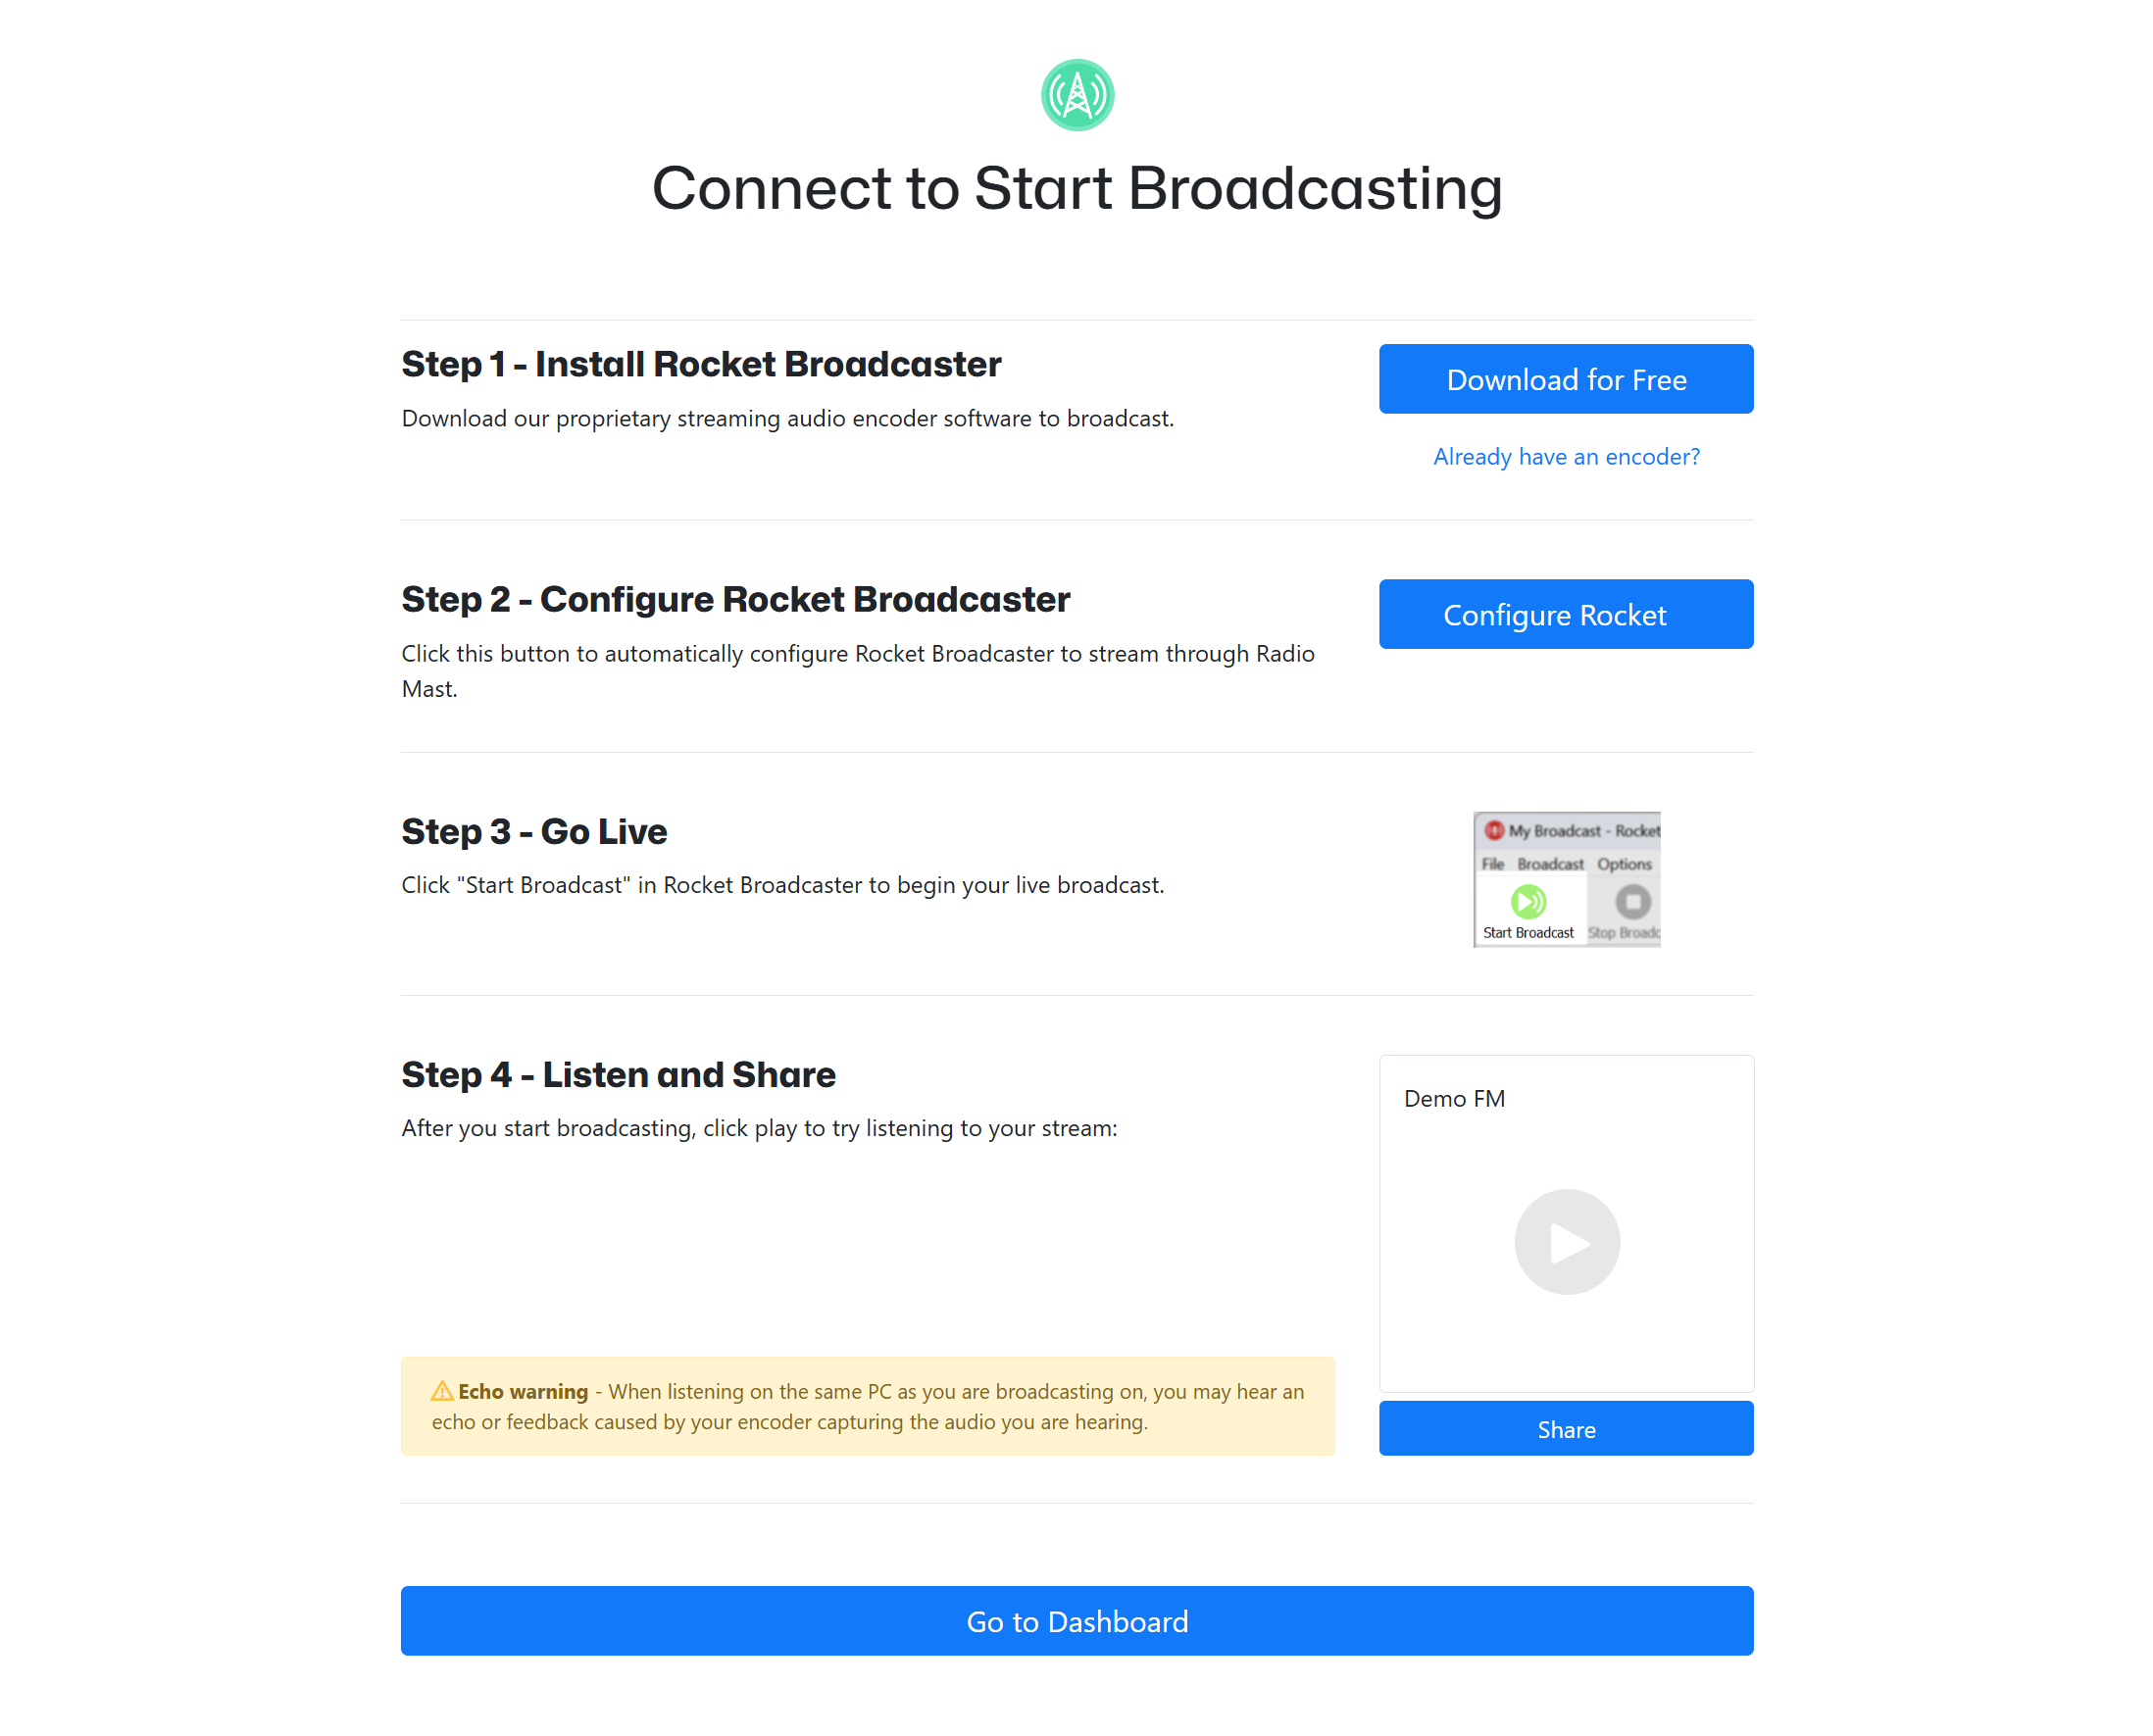
If you haven't already downloaded Rocket Broadcaster, click the download button to get it. Install it before proceeding.
If you'd like to use another encoder, click "Already have an encoder?" and your stream connection information will be presented to you. We have guides on how to configure other encoders like SAM Cast and the Barix Instreamer here.
After you have Rocket Broadcaster installed, just click Configure Rocket and Rocket Broadcaster will be automatically configured to connect to your stream.
In the main Rocket Broadcaster window, just click Start Broadcast in the toolbar at the top to start broadcasting live audio. You're now live!
Before you go any further, it's very important to understand how Rocket Broadcaster works:
Rocket Broadcaster has two audio capture channels: One labelled "Audio Input", which captures audio from your microphone or line-in jack on your soundcard, and a second input labelled "Other Applications", which captures audio that you can hear from other apps running on your PC. This captures the local desktop audio. Depending on what audio you want to broadcast, we recommend muting any unused channel by clicking the small blue speaker icon underneath it in the main Rocket Broadcaster window.
We also recommend double-checking the soundcard settings in Rocket Broadcaster to make sure it's capturing from your preferred devices. Click Options->Preferences to see those settings and configure which devices are being captured from.
Step 4: Listen and Share.
You can now click the play button on that page to hear your stream live. We recommend clicking the "Share" button and sending that link to another PC or your mobile phone, so that you can preview it on a different device than the one you're broadcasting on. If you do broadcast and listen from the same device, you can get a feedback loop unless you mute the "Other Applications" capture channel in Rocket Broadcaster.
Radio Mast provides an embeddable radio player widget for your website. If you click the Share button, you will also see the HTML code to embed the player widget on your own website. You can embed that on your website to easily share your stream with your listeners.
The Direct Stream URL shown is suitable for embedding in mobile apps and submission to stream directories like TuneIn.
You can find all of this information and more later in the Overview tab of your stream in your account.
Step 5: Explore your Account.
Click Go to Dashboard to continue through to your account.
Step 6: View Listeners Statistics and More.
Track how many listeners your stream is attracting using our built-in listener statistics. In the Radio Mast interface, select Streams -> Listeners. You can also enable our enhanced Analytics add-on by clicking Analytics in the menu on the left side of your station.
If you need high capacity streaming, you can increase your listener capacity by clicking Pools at the top of your account, then choosing Default Pool and adjusting from there.
Step 7: Upgrade and Beyond
To continue broadcasting after your trial is complete, visit the Billing page and add a payment method to your account. This will ensure your streaming continues uninterrupted and can continue to be enjoyed by your listeners.
Troubleshooting and Questions
If you have questions or ran into any issues during this quickstart guide, please contact support and we'd be happy to help.