Cloud Transcoder
Radio Mast Cloud Transcoder allows you to convert an Icecast, Shoutcast, or HLS audio stream to a different format.
What does Cloud Transcoder do?
A Cloud Transcoder instance takes an existing Icecast, Shoutcast, or HLS stream, and transcodes it to a new codec and bitrate. The transcoded audio can be output to a stream on the Radio Mast Streaming Network or an external Icecast server of your choosing. You can choose to transcode any existing HTTP/Icecast/Shoutcast/HLS audio stream, whether it’s part of the Radio Mast Streaming Network or not, and convert it to a format and quality of your choice for a monthly fee. Setup is instant and there is no setup fee. Billing is by the hour.
Cloud Transcoder streams can also be monitored for silence and stream uptime using Radio Mast Stream Monitoring.
The following codecs are supported by Radio Mast Cloud Transcoder:
| Codec | Input | Output | Bitrates |
|---|---|---|---|
| MP3 | ✔️ | ✔️ | 16 - 320 kbps |
| AAC | ✔️ | ✔️ | 16 - 320 kbps |
| HE-AAC+ v2 | ✔️ | ✔️ | 16 - 320 kbps |
| HE -AAC v1 | ✔️ | ✔️ | 16 - 320 kbps |
| Ogg Opus | ✔️ | ✔️ | 16 - 320 kbps |
| Ogg Vorbis | ✔️ | ✔️ | 16 - 320 kbps |
| Ogg FLAC | ✔️ | ❌ | N/A |
The following types of streams can be converted by Radio Mast Cloud Transcoder:
| Stream / Server Type | Input (Converting from) | Output (Converting to) |
|---|---|---|
| Radio Mast Streaming Network | ✔️ | ✔️ |
| Icecast | ✔️ | ✔️ |
| Shoutcast 1 | ✔️ | ✔️ |
| Shoutcast 2 | ✔️ | ❌️ |
| RSAS | ✔️ | ✔️ |
| HLS | ✔️ | ❌* |
* To convert to HLS, simply output as a regular Icecast MP3 or AAC stream on the Radio Mast Streaming Network. All AAC and MP3 streams on Radio Mast are automatically available as HLS. Read more about HLS on Radio Mast.
Why should I use a Cloud Transcoder?
Cloud Transcoder can be used to improve the stability and quality of your stream for mobile listeners.
For example, if you broadcast a single high bitrate, high quality stream, Cloud Transcoder can provide a lower quality, lower bitrate stream for your mobile listeners. Newer codecs like AAC+ can even provide great quality at very low bitrates. Low bitrates benefit mobile listeners by reducing their mobile data usage and minimizing dropouts or buffering in areas with weak signal strength or heavy network congestion.
The quick setup and convenient configuration of Cloud Transcoder makes it easy to experiment with different codecs and bitrates, to help you find the combination that works best for your radio station's requirements.
Note that when transcoding from a higher bitrate stream to a lower bitrate stream, you might experience a loss of audio quality. Read more about the different types of audio codecs on our Radio Mast blog.
Where are Cloud Transcoders located?
A Cloud Transcoder instance can be created in any of the following regions:
- Toronto, Canada
- San Francisco, USA
- New York, USA
- London, UK
- Singapore
Creating a Cloud Transcoder close to your encoder and listeners can help minimize latency and improve reliability by reducing the network distance your audio needs to travel.
How do I set up a Cloud Transcoder instance?
Step 1) Log in to your Radio Mast account to create a new Transcoder
To get started using the Radio Mast Cloud Transcoder, select the Transcoders menu item on the left, then click the ‘Create a Transcoder’ button.

Step 2) Enter details to create your Transcoder Assign a name for your Transcoder. If you plan on having more than one transcoder, be descriptive about the stream origin and output format in the Transcoder name.
In the Input Stream section, you can choose a steam to transcode: either one hosted on the Radio Mast Streaming Network, or an external one. If you are choosing an external one, all you need is the direct stream URL. Either enter a stream URL on the left, or use the drop-down menu on the right to choose your input stream hosted on Radio Mast.
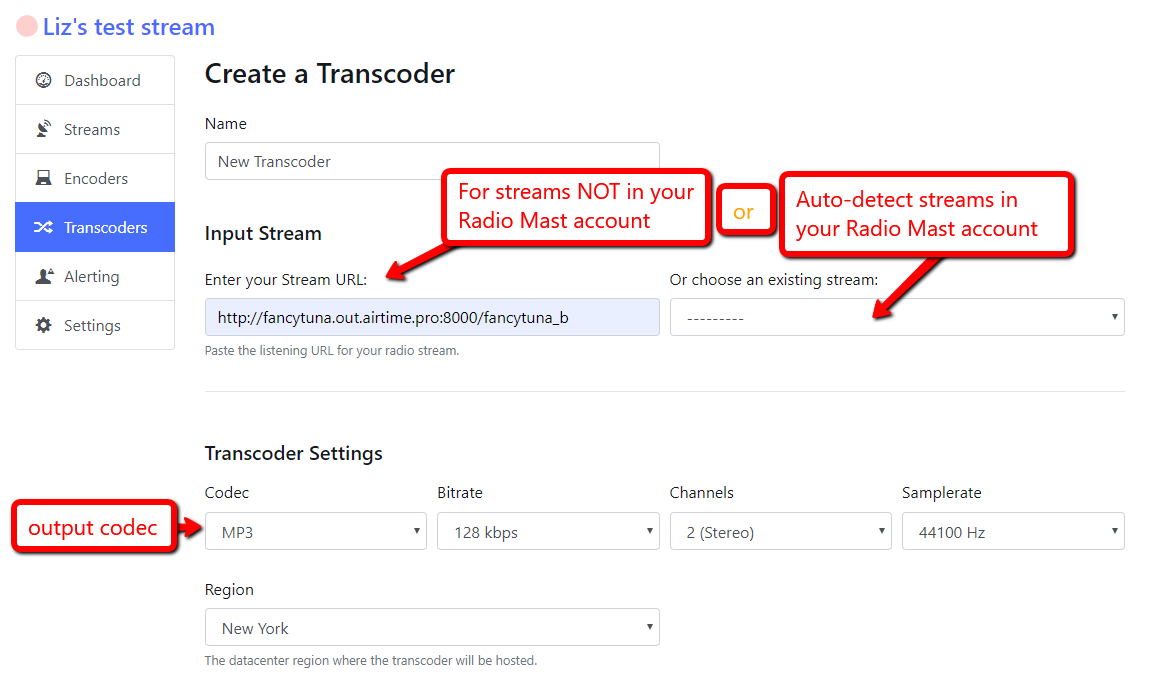
Step 3) Choose a format for your output stream In the Transcoder Settings section, choose an output codec, bitrate, channels and samplerate.
In the Region, choose a server location to host your transcoded stream. You should choose the server location closest to where your input stream is located.
Step 4) Choose a steam host and create the Transcoder You have the option to send the stream to an external icecast server, have the stream hosted on Radio Mast, either as a new stream or one a stream you have already created. Use the ‘Create Transcoder’ button at the bottom of your page to save your setup.
Step 5) Access your Transcoder stream
You will be able to view the transcoder stream under the Streams menu of the Radio Mast Station page under which the Cloud Transcoder stream was created.
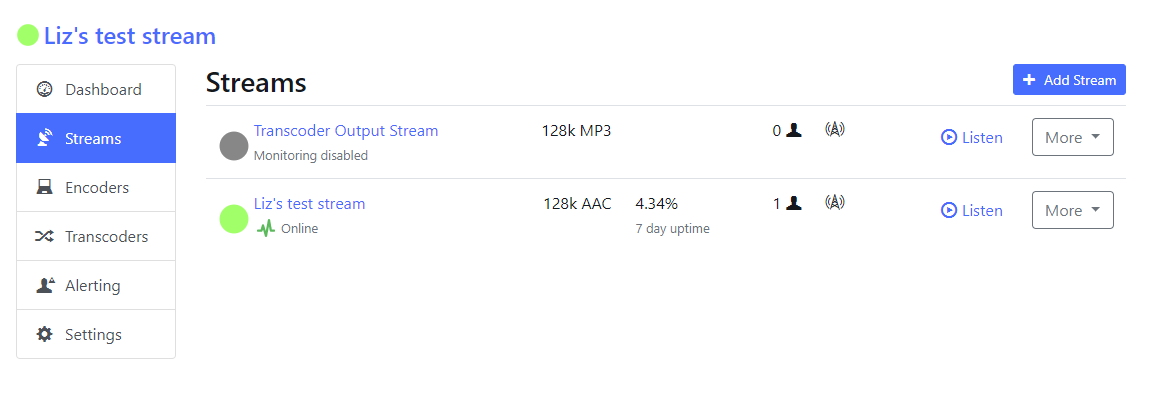
Clicking on the transcoder stream name in this menu will allow you to access the monitoring, listener statistics and configuration of your new output stream.